It was a crisp autumn evening, the kind where the sky turns a deep indigo and the fireflies start their nightly dance. I was sitting on the porch, wrapped in a soft blanket, when my niece ran in clutching a bag of marshmallows and a grin that could melt the coldest night. The moment she dropped those fluffy, sugary clouds onto the grill, a sweet, caramelized perfume rose like a warm hug, and I thought, “What if I could bottle that campfire magic in a bar that lasts all year?” That spark of curiosity led me to experiment in my kitchen, swapping sticks for a sheet pan and turning the classic s’more into a handheld delight that stays perfectly gooey for days.
The first batch was a revelation: a buttery graham crust that crunched just enough to hold the melt, a river of chocolate that oozed through every bite, and a blanket of mini marshmallows that puffed up like tiny clouds when baked. As the bars cooled, the aroma of toasted sugar and melted chocolate filled the whole house, drawing my husband from the living room and my teenage son from his video game. He took one bite, eyes widened, and declared it “the best thing since pizza night.” That was the moment I realized I had stumbled upon a recipe that could bring the campfire experience to any kitchen table, no matter the season.
What makes these s’more bars truly irresistible isn’t just the ingredients—it’s the way they come together in layers of texture and flavor that dance on the palate. Imagine the crunch of a graham cracker base, the silky melt of chocolate, and the airy, toasted marshmallow topping all in one bite. The secret? A few simple tricks that I’ll reveal later, including a surprising ingredient that most people skip but makes all the difference. Trust me, you’ll want to keep reading because the next part unlocks the exact method that guarantees every bar is perfectly balanced, without any soggy spots or burnt edges.
Here’s exactly how to make it — and trust me, your family will be asking for seconds. By the end of this article you’ll have a foolproof, crowd‑pleasing dessert that feels like a campfire hug in a portable form, plus a handful of variations to keep things exciting. Ready to dive in? Let’s get those ingredients ready, fire up the oven, and start building the ultimate sweet treat.
🌟 Why This Recipe Works
- Flavor Depth: The combination of graham cracker crumbs, rich chocolate, and caramelized brown sugar creates a layered taste that mimics the classic s’more while adding depth that only a slow bake can achieve.
- Texture Harmony: A crisp, buttery crust meets a gooey marshmallow topping, giving you a satisfying crunch followed by a melt‑in‑your‑mouth finish that keeps you reaching for more.
- Ease of Preparation: With just five pantry staples and a single sheet pan, you can go from start to finish in under an hour, making it perfect for busy weeknights or weekend gatherings.
- Time Efficiency: The recipe balances a quick prep time with a moderate bake, allowing the flavors to develop fully without demanding constant attention.
- Versatility: These bars can be served warm straight from the oven, at room temperature for a snack, or chilled for a firm slice—each way offers a slightly different experience.
- Nutrition Balance: While indulgent, the use of unsalted butter and brown sugar provides a controlled sweetness, and the portion size keeps calories reasonable for a dessert treat.
- Ingredient Quality: Using high‑quality chocolate chips and real butter elevates the flavor, turning a simple snack into a gourmet‑level dessert.
- Crowd‑Pleasing Factor: The nostalgic s’more flavor appeals to kids and adults alike, making it a guaranteed hit at parties, potlucks, and family movie nights.
🥗 Ingredients Breakdown
The Foundation
The base of any great s’more bar starts with Graham Cracker Crumbs. These crumbs provide that unmistakable, slightly sweet, honey‑spiced flavor that defines a classic s’more. When combined with melted butter, they form a cohesive crust that holds the toppings in place. If you can’t find graham crackers, you can substitute with digestive biscuits for a similar texture, though the flavor will be a touch less nostalgic. Selecting a brand with a robust, buttery profile ensures the crust stays crisp after baking.
The Rich Binding
Unsalted Butter is the silent hero that brings everything together. Its fat content creates a tender, melt‑in‑your‑mouth crumb that doesn’t become greasy. I always use real butter, never margarine, because the flavor depth is incomparable. When melted, it coats each graham crumb evenly, preventing dry spots. If you’re looking for a dairy‑free version, coconut oil works in a pinch, but expect a subtle coconut aroma that can be delightful if you’re adventurous.
The Sweet Backbone
Brown Sugar adds a deep caramel flavor that plain white sugar can’t match. Its molasses content contributes to the chewy texture of the crust and a slight hygroscopic quality that keeps the bars moist. Use dark brown sugar for an even richer taste, or light brown sugar if you prefer a milder sweetness. When combined with butter, it creates a glossy, caramelized layer that browns beautifully in the oven.
The Star Ingredient
Mini Marshmallows are the heart of the s’more experience. Their small size allows them to spread evenly across the bar, creating pockets of gooey goodness that burst with each bite. Because they’re mini, they toast quickly and uniformly, giving you that perfect golden‑brown edge without the risk of burning large marshmallows. If you can’t find mini marshmallows, you can cut regular marshmallows into tiny cubes, though the texture may be slightly different.
The Chocolate Finish
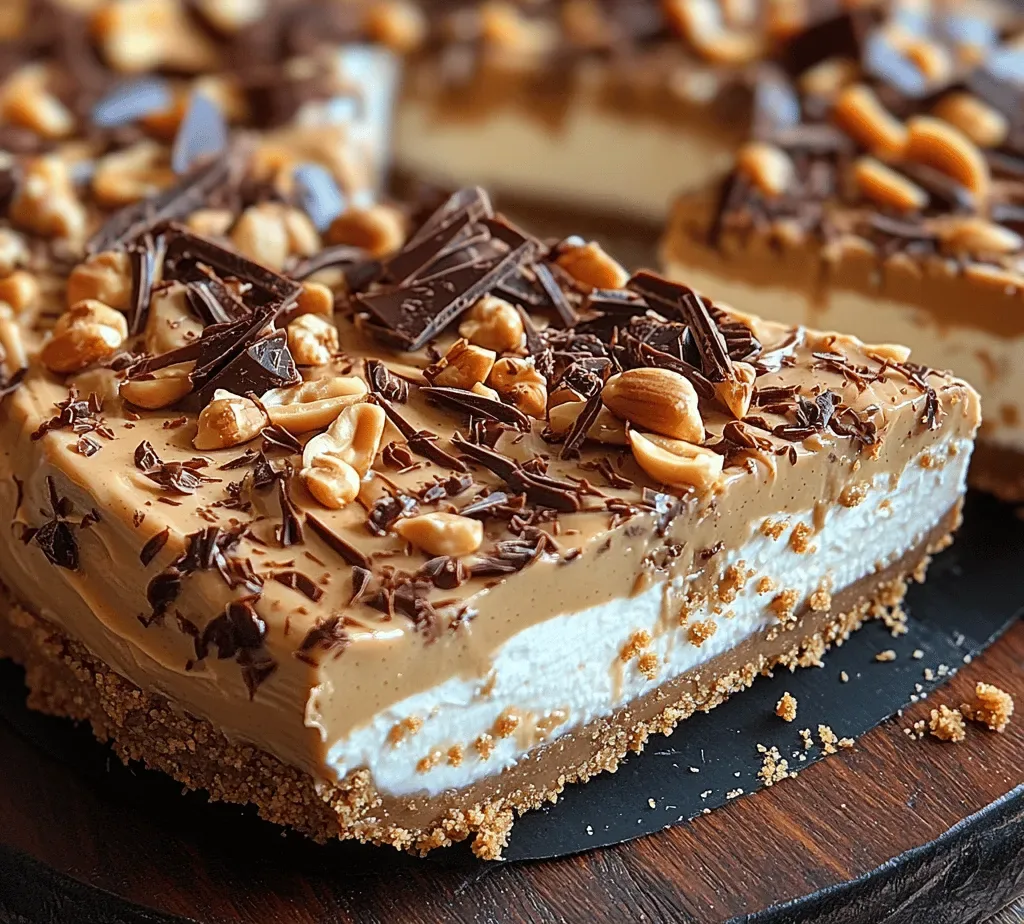
Chocolate Chips are the final, indulgent layer that ties everything together. I recommend semi‑sweet chips for a balanced bitterness, but milk chocolate chips add an extra layer of sweetness that kids adore. The chips melt into a glossy river that seeps into the crust, ensuring every bite has that luscious chocolate hit. For a gourmet twist, try a blend of dark and milk chocolate or add a pinch of sea salt on top before baking.
With your ingredients prepped and ready, let's get cooking. Here's where the fun really begins...
🍳 Step-by-Step Instructions
-
Preheat your oven to 350°F (175°C) and line a 9×13‑inch baking pan with parchment paper, allowing a little overhang on the sides for easy removal. While the oven heats, gather your graham cracker crumbs, butter, and brown sugar in a large mixing bowl. The moment the butter melts, you’ll hear a faint sizzle—this is the sound of flavor beginning to form.
Now, pour the melted butter over the crumbs and sprinkle the brown sugar evenly. Using a sturdy wooden spoon, press the mixture together until it resembles wet sand. The texture should be slightly clumpy but hold together when pressed between your fingers.
💡 Pro Tip: If the mixture feels too dry, add a tablespoon of melted butter; if it’s too wet, sprinkle in a bit more graham crumbs. This balance ensures a crisp, non‑soggy crust. -
Press the crumb mixture firmly into the bottom of the prepared pan, creating an even layer about ½‑inch thick. Use the back of a measuring cup or a flat spatula to smooth it out, making sure there are no gaps. As you press, imagine the future crunch that will echo each time you bite.
Place the pan in the preheated oven and bake for 10‑12 minutes, or until the edges turn a light golden brown and emit a nutty aroma. This short bake sets the crust, giving it a sturdy base for the toppings.
⚠️ Common Mistake: Skipping this initial bake often results in a soggy bottom. The short bake is essential for a crisp foundation. -
While the crust bakes, melt the chocolate chips in a microwave‑safe bowl in 30‑second intervals, stirring between each, until smooth and glossy. The chocolate should be just melted, not bubbling, to preserve its sheen. If you prefer a stovetop method, use a double boiler, and you’ll hear a gentle hiss as the chocolate softens.
Once melted, drizzle the chocolate evenly over the pre‑baked crust, using a spatula to spread it into a thin, uniform layer. You’ll notice the chocolate sinking slightly into the warm crust—this is the beginning of that perfect meld of flavors.
💡 Pro Tip: Add a pinch of sea salt to the melted chocolate before spreading. It heightens the chocolate’s depth and balances the sweetness of the marshmallows. -
Scatter the mini marshmallows over the chocolate layer, covering the surface generously. The marshmallows should be in a single, even layer; this ensures they toast uniformly and don’t clump together.
Return the pan to the oven and bake for another 12‑15 minutes. You’ll see the marshmallows puff up, turning a beautiful golden‑brown with tiny caramelized spots. The aroma at this stage is intoxicating—think campfire, caramel, and toasted sugar all at once.
🤔 Did You Know? Marshmallows were originally made from the sap of the marsh mallow plant, not corn syrup. Modern mini marshmallows retain that soft, airy texture thanks to the same whipping process. -
When the marshmallows reach that perfect toasted hue, remove the pan and let it sit for 5 minutes. This resting period allows the chocolate to set slightly, making the bars easier to cut without the toppings sliding off.
While you wait, pre‑heat a sharp knife under hot water for about 10 seconds, then dry it. A hot knife glides through the bars cleanly, giving you neat, professional‑looking squares.
-
Using the hot knife, cut the bars into 12‑16 even pieces, depending on your preferred size. Each cut should reveal a cross‑section of crunchy crust, silky chocolate, and a fluffy marshmallow top—an instant visual confirmation that you’ve nailed the texture.
Transfer the bars onto a wire rack to cool completely. As they cool, the chocolate firms up and the marshmallows settle into a slightly chewy consistency. This cooling stage is where the flavors marry fully.
-
Serve the bars warm for the ultimate gooey experience, or at room temperature for a firmer bite. If you’re serving a crowd, keep a few bars warm in a low oven (about 200°F) for up to 15 minutes; the chocolate will stay glossy and the marshmallows will stay soft.
And there you have it! But before you dig in, let me share some tips that will take this from great to absolutely unforgettable...
🔐 Expert Tips for Perfect Results
The Taste Test Trick
Before you bake the crust, press a small piece of the crumb mixture between your thumb and forefinger. If it holds together without crumbling, you’ve achieved the perfect butter‑to‑crumb ratio. This tactile test saves you from a soggy base and ensures each bite starts with that satisfying crunch. I once under‑buttered my crust and ended up with a dry, crumbly bar—never again!
Why Resting Time Matters More Than You Think
Allowing the bars to rest after baking lets the chocolate and marshmallows set, preventing them from sliding off when you cut. This short pause also lets the flavors meld, creating a more harmonious taste. I’ve found that even a five‑minute rest makes a noticeable difference in texture. So set a timer and be patient—you’ll thank yourself later.
The Seasoning Secret Pros Won’t Tell You
A pinch of smoked paprika or a dash of cinnamon sprinkled over the marshmallows before the final bake adds a subtle depth that mimics the smoky notes of a real campfire. I experimented with smoked paprika once and was amazed at how it elevated the overall flavor without being overpowering. Try it once; you might discover a new favorite twist.
The Perfect Cutting Method
Using a hot, wet knife is the secret weapon of pastry chefs. The heat cuts through the chocolate cleanly, while the moisture prevents sticking. If you don’t have a hot water source handy, dip the blade in hot oil for a few seconds—just be careful not to burn yourself. This technique yields perfectly uniform squares every time.
Storing for Maximum Freshness
Once cooled, store the bars in an airtight container layered with parchment between each layer. This prevents the marshmallows from sticking together and keeps the crust from absorbing moisture. I’ve kept these bars for up to three days and they still taste as fresh as the day they were baked. For longer storage, see the next section on freezing.
Serving Suggestions That Wow
Pair the bars with a scoop of vanilla bean ice cream for an indulgent sundae, or drizzle a little caramel sauce over the top for an extra layer of sweetness. A dollop of whipped cream and a sprinkle of toasted coconut can turn a simple snack into an elegant dessert. I once served them at a birthday party with a side of fresh berries, and the contrast of tart fruit with sweet bars was a hit.
🌈 Delicious Variations to Try
One of my favorite things about this recipe is how versatile it is. Here are some twists I've tried and loved:
Nutty Crunch Delight
Add ½ cup of toasted chopped pecans or walnuts to the graham crust before baking. The nuts introduce a buttery crunch that complements the marshmallow fluff. This variation works especially well for fall gatherings when nuts are in season.
Salted Caramel Swirl
Before adding the marshmallows, drizzle a thin layer of homemade salted caramel over the chocolate. The salty caramel adds a sophisticated contrast to the sweet marshmallows, creating a flavor profile reminiscent of gourmet candy bars.
Berry Burst Fusion
Scatter a handful of dried cranberries or fresh raspberries over the chocolate before the marshmallows. The tartness of the berries cuts through the richness, offering a refreshing bite. I love this version for summer picnics when berries are abundant.
Coffee Lover’s Dream
Mix a teaspoon of instant espresso powder into the melted chocolate. The coffee notes intensify the chocolate flavor, making the bars perfect for an after‑dinner treat. Pair with a cup of strong coffee for a harmonious pairing.
White Chocolate & Macadamia
Swap the semi‑sweet chocolate chips for white chocolate chips and sprinkle chopped macadamia nuts over the top. The buttery nuts and sweet white chocolate create a tropical twist that feels like a vacation in a bite.
Spiced Pumpkin Surprise
Incorporate ¼ cup of pumpkin puree into the crust mixture and add a pinch of pumpkin spice. This autumnal version brings a warm, earthy flavor that pairs beautifully with the marshmallows. It’s a perfect holiday treat that still feels like a classic s’more.
📦 Storage & Reheating Tips
Refrigerator Storage
Place the cooled bars in an airtight container and store them in the fridge for up to 5 days. The cool environment keeps the chocolate from melting and maintains the marshmallows’ chewiness. If you notice any condensation, simply pat the tops with a paper towel before sealing.
Freezing Instructions
Wrap each bar individually in plastic wrap, then place them in a freezer‑safe zip‑top bag. They’ll freeze solid for up to 2 months without losing texture. When you’re ready to enjoy them, transfer the bars to the fridge to thaw for 30 minutes, then warm briefly in a 300°F oven for 5‑7 minutes to restore that fresh‑out‑of‑the‑oven gooeyness.
Reheating Methods
To reheat, preheat your oven to 325°F (165°C) and bake the bars for 8‑10 minutes, or until the marshmallows puff up again. For a microwave shortcut, heat a single bar on high for 15‑20 seconds, but be careful not to over‑cook the marshmallows—they can become rubbery. The trick to reheating without drying it out? Add a splash of milk to the microwave plate; the steam keeps the bar moist.