Summer mornings are made for sunshine, sticky fingers, and the irresistible aroma of melted cheese. Our Fun and Fresh Summer Quesadillas for Kids capture that carefree spirit in a handheld breakfast that’s as colorful as a backyard picnic.
What sets this recipe apart is the playful mix of crisp vegetables, juicy fruit salsa, and a hint of mild protein—all tucked between two golden‑brown tortillas. The result is a bite‑size masterpiece that balances sweet, salty, and tangy flavors without overwhelming tiny taste buds.
Kids will love the bright colors and the hands‑on experience of folding their own quesadillas, while parents will appreciate a nutritious start that can double as a brunch treat for the whole family. Perfect for lazy weekends, school‑day mornings, or a sunny brunch gathering.
The cooking process is straightforward: sauté a quick veggie‑protein mix, assemble the fillings on tortillas, then pan‑fry until the cheese melts and the edges turn delightfully crisp. In just ten minutes you’ll have a plate full of smile‑inducing, flavor‑packed quesadillas.
Why You'll Love This Recipe
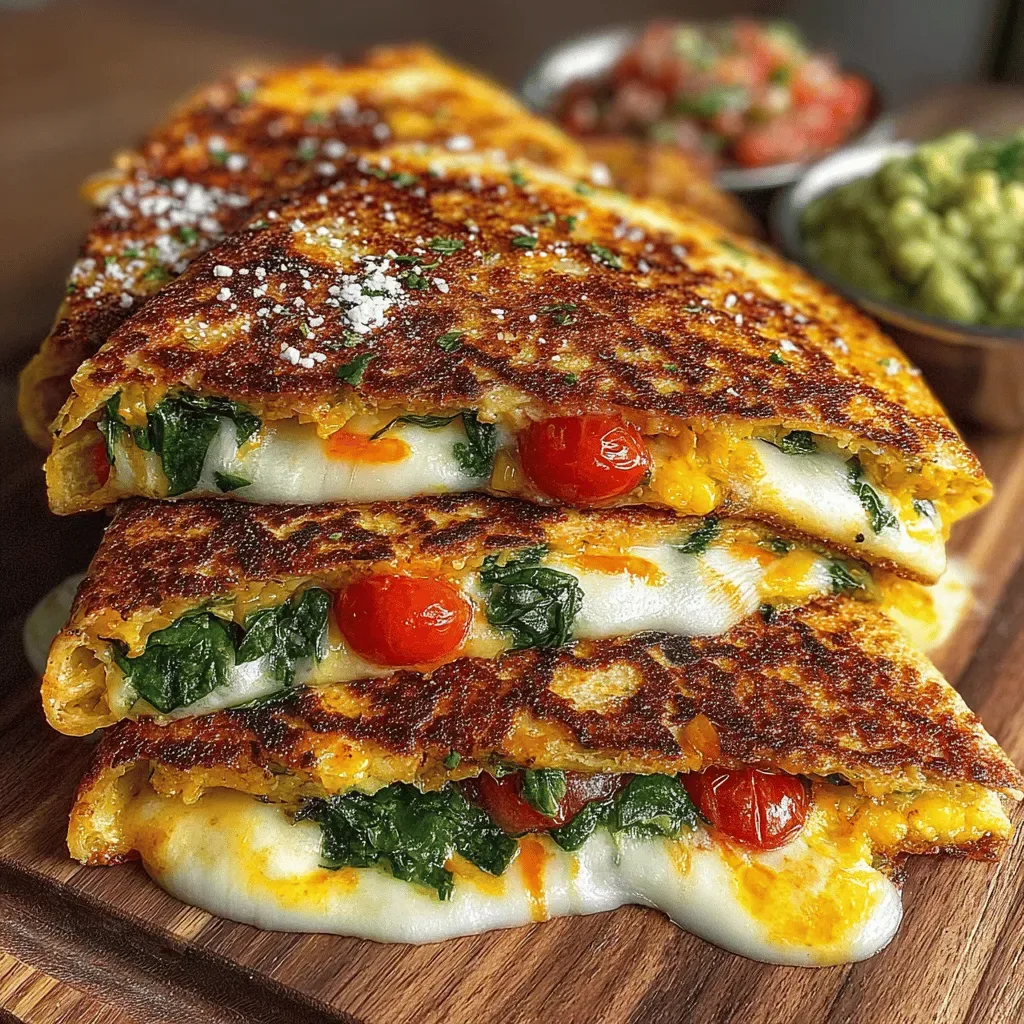
Bright & Playful Presentation: The rainbow of bell peppers, corn, and pineapple creates a visual feast that instantly captures children’s attention and makes eating feel like an adventure.
Speedy Weekday Solution: With a prep time of just fifteen minutes, this dish slides effortlessly into busy morning schedules while still feeling special enough for a weekend brunch.
Balanced Nutrition: Each quesadilla delivers protein, calcium, fiber, and vitamin‑C, giving growing bodies the nutrients they need without compromising on taste.
Customizable Fun: Kids can help choose their favorite fillings, turning dinner prep into a collaborative activity that builds confidence and encourages healthier eating habits.
Ingredients
The magic of these summer quesadillas lies in fresh, kid‑friendly ingredients that bring flavor and texture without overwhelming the palate. Tender chicken or black beans provide a protein backbone, while crisp bell peppers, sweet corn, and juicy pineapple add color and natural sweetness. A blend of mild cheddar and creamy mozzarella guarantees a gooey melt, and a light lime‑cilantro crema ties everything together with a tangy finish.
Main Ingredients
- 2 cups cooked chicken, shredded
- 8 small flour tortillas (8‑inch)
Vegetable & Fruit Fillings
- ½ cup red bell pepper, finely diced
- ½ cup yellow bell pepper, finely diced
- ¼ cup sweet corn kernels (fresh or frozen)
- ¼ cup pineapple chunks, diced small
Cheese Blend
- 1 cup shredded mild cheddar cheese
- 1 cup shredded mozzarella cheese
Lime‑Cilantro Crema (Sauce)
- ½ cup plain Greek yogurt
- 1 tablespoon fresh lime juice
- 1 teaspoon lime zest
- 2 teaspoons chopped fresh cilantro
- ¼ teaspoon sea salt
Seasonings & Cooking Essentials
- 1 tablespoon olive oil
- ½ teaspoon mild chili powder (optional)
- Freshly ground black pepper, to taste
Together, these ingredients create a harmonious balance of flavors and textures. The chicken offers lean protein, while the corn and pineapple introduce natural sweetness that pairs beautifully with the mild heat of chili powder. The dual‑cheese blend guarantees a stretchy, melty interior, and the lime‑cilantro crema adds a refreshing zing that cuts through the richness, making each bite feel light, bright, and perfectly suited for a sunny morning.
Step-by-Step Instructions
Preparing the Fillings
Begin by heating 1 tablespoon olive oil in a large skillet over medium heat. Add the diced red and yellow bell peppers, cooking for 2‑3 minutes until they soften but retain a slight crunch. Stir in the corn kernels and pineapple chunks, then sprinkle with ½ teaspoon mild chili powder and a pinch of black pepper. Cook for another 2 minutes, allowing the fruit to caramelize lightly. Finally, fold in the shredded chicken just to warm it through; this step ensures every bite is uniformly hot without drying out the protein.
Making the Lime‑Cilantro Crema
While the filling simmers, whisk together ½ cup plain Greek yogurt, 1 tablespoon fresh lime juice, 1 teaspoon lime zest, 2 teaspoons chopped cilantro, and ¼ teaspoon sea salt in a small bowl. The crema should be smooth and slightly tangy; taste and adjust salt or lime if needed. This sauce will be drizzled on the finished quesadillas, adding a cool contrast to the warm fillings.
Assembling the Quesadillas
- Lay Out Tortillas. Place four tortillas on a clean work surface. Spread a thin layer of the lime‑cilantro crema on each, using the back of a spoon to cover the surface evenly. This prevents the tortilla from becoming soggy and adds flavor from the first bite.
- Add Cheese. Sprinkle a generous mixture of 1 cup shredded mild cheddar and 1 cup shredded mozzarella over the crema. The cheese acts as a glue, holding the fillings in place once melted.
- Layer Fillings. Evenly distribute the warm chicken‑vegetable‑fruit mixture over the cheese, making sure not to overfill. A balanced amount ensures each quarter‑section bites through all components.
- Top & Seal. Place a second tortilla on top of each assembled stack, pressing gently to adhere. The crema on the top tortilla adds extra moisture and helps the quesadilla brown evenly.
Cooking the Quesadillas
Wipe the skillet clean and return it to medium‑high heat. Add a tiny drizzle of olive oil, just enough to coat the surface. Transfer one assembled quesadilla to the pan; cook for 2‑3 minutes until the bottom tortilla turns golden‑brown and the cheese starts to melt. Flip carefully with a spatula and cook the other side for another 2‑3 minutes. Repeat with the remaining quesadillas, adding a splash more oil if the pan looks dry.
Finishing & Serving
Remove each quesadilla from the pan and let it rest for 30 seconds—this brief pause lets the cheese set, making slicing easier. Cut each into four wedges, drizzle a little extra lime‑cilantro crema on top, and serve immediately. For extra fun, provide small bowls of extra crema for dipping.
Tips & Tricks
Perfecting the Recipe
Dry Ingredients First: Pat the cooked chicken and vegetables dry with paper towels before adding them to the tortilla. Excess moisture creates soggy quesadillas and prevents a crisp crust.
Medium Heat Is Key: Cooking on medium heat gives the cheese time to melt fully while the tortilla browns evenly, avoiding burnt edges and raw cheese.
Flavor Enhancements
Add a sprinkle of finely diced avocado after cooking for buttery richness, or a dash of smoked paprika to the filling for subtle depth. A quick squeeze of fresh lime over the finished wedges brightens the overall flavor profile.
Common Mistakes to Avoid
Avoid stacking too many fillings; overstuffed quesadillas can burst open, spilling cheese and sauce. Also, never skip the brief resting time after cooking—cutting too early leads to a messy, cheese‑dripping plate.
Pro Tips
Use a Cast‑Iron Skillet: The even heat distribution of cast iron creates the perfect, uniformly crisp tortilla without hot spots.
Keep a Warm Oven: If you’re making a large batch, place finished quesadillas on a baking sheet in a 200°F oven to stay warm while you finish the rest.
Cut With a Sharp Pizza Wheel: A clean, sharp wheel glides through melted cheese, giving neat, uniform wedges without pulling the filling apart.
Prep Ahead: Assemble all components (fillings, crema, cheese) in separate bowls the night before; cooking time will then be truly under ten minutes.
Variations
Ingredient Swaps
Swap the chicken for shredded turkey, black beans, or diced tempeh for a vegetarian twist. Replace bell peppers with thinly sliced zucchini or spinach for a softer texture. If pineapple isn’t a favorite, try diced mango or a handful of fresh berries for a different sweet note. Even a drizzle of honey can replace the lime‑cilantro crema for a sweeter dip.
Dietary Adjustments
Use gluten‑free corn tortillas for a wheat‑free version. Substitute Greek yogurt with a dairy‑free coconut‑milk yogurt to keep the crema creamy and dairy‑free. For a low‑carb option, choose low‑carb tortillas and omit the corn, increasing the proportion of cheese and protein.
Serving Suggestions
Pair the quesadillas with a simple cucumber‑mint salad, a side of fresh fruit skewers, or a bowl of warm black‑bean soup for a heartier brunch. A small cup of homemade salsa or guacamole makes a fun dipping station that kids love to explore.
Storage Info
Leftover Storage
Allow any leftover quesadillas to cool to room temperature (no more than two hours). Then place them in a single layer inside an airtight container or wrap each tightly in parchment followed by foil. Refrigerate for up to three days. For longer keeping, freeze individually wrapped quesadillas in a zip‑top freezer bag; they’ll stay fresh for up to two months.
Reheating Instructions
Reheat frozen or refrigerated quesadillas in a preheated 350°F oven for 8‑10 minutes, turning halfway through, until the cheese is melty and the tortilla regains crispness. For a quicker fix, use a skillet over medium heat, pressing gently with a spatula for 2‑3 minutes per side. Avoid microwaving alone, as it can make the tortilla rubbery; if you must, microwave briefly then finish in a hot pan.
Frequently Asked Questions
This summer quesadilla recipe delivers bright flavors, wholesome nutrition, and a hands‑on experience that kids adore. By following the step‑by‑step guide, using fresh ingredients, and applying the pro tips, you’ll create a breakfast‑brunch favorite that’s ready in minutes. Feel free to swap proteins, experiment with veggies, or adjust the seasonings to match your family’s palate. Serve warm, enjoy the smiles, and let the sunshine flavor your morning!


